


Loading a bike rack correctly: How to get your bikes to their destination safely
Stefan Frey
· 11.07.2026


Fitting a bike carrier to the tow bar can usually be done without tools, but it still requires care. It is essential that the carrier is free of play and sits correctly on the tow bar. A clean seat not only ensures stability whilst riding, but also prevents creaking or thudding noises on rough roads.
The installation: calm rather than chaos
It is important to close the locking mechanism fully and then check whether the bike rack can still be moved. Many systems indicate that they have been fitted correctly either by a clicking sound or visually – for example, via a green indicator near the coupling. This step is often overlooked, particularly with systems that are a little stiff. It is worth carrying out a quick visual and shake test – especially before longer journeys.
Support structures & installation
- The carrier is correctly fitted and fully locked in place
- No play in the tow bar (shake test)
- Is the safety mechanism active?
Loading a bike rack starts with a systematic approach
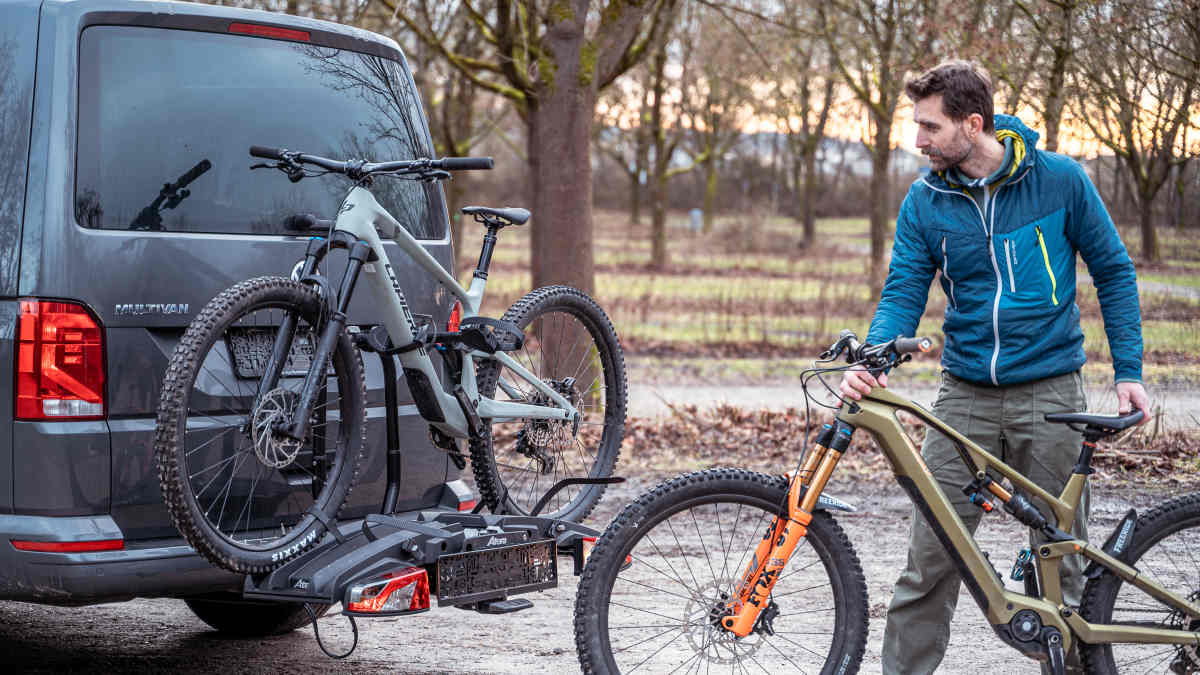
When loading, there is a simple but often overlooked rule: The heaviest bicycle should be placed first and as close to the vehicle as possible. This reduces the leverage acting on the tow bar, which benefits both the drawbar load and the vehicle’s handling.
With a bike rack designed to carry several bikes, this order also affects the stability of the outer bikes. Lighter bikes are easier to position and are less likely to come into contact with the handlebars, saddles or frames of the bikes already mounted.

Particularly wide handlebars may, in some circumstances, come into contact with the vehicle’s rear window. In this case, the stem will need to be turned slightly when loading the bike. It is also often a good idea to lower the saddle to make room for the next bike.
Before hoisting the first bike onto the carrier, you should open the clamps and the ratchet straps for the wheels. Once the bike is on the bike carrier, it gets tricky. Balancing the bike with one hand whilst opening the fastenings with the other – that rarely goes well.
Loading the bike rack
- The heaviest bicycle is parked near the vehicle
- Bicycles neatly aligned in the rails
- There is sufficient space between the bikes
Lifting bicycles – using technique rather than strength
Even though front-mount bike racks are considered convenient, you can’t do without a bit of physical effort. With e-bikes in particular, it’s advisable to remove anything that can be taken off before lifting the bike onto the rack. Batteries, on-board computers and water bottles not only reduce the weight but also minimise the risk of damage. Furthermore, they have no place on the bike rack whilst riding anyway – anything that isn’t securely attached to the bike can come loose whilst riding and pose a hazard to traffic behind you.
A smooth, fluid movement, kept as close to the body as possible, takes the strain off your back and joints. Anyone who regularly transports heavy bikes should look specifically for bike racks with a low loading height, wide rails and optional access ramps. Almost all manufacturers now include the latter in their range of accessories.
Special considerations when handling e-bikes
E-bikes differ not only in weight, but also in their construction and sensitivity. Consequently, they require a tailored approach. The first step comes even before you lift the bike: Batteries, displays and control units should always be removed. This reduces weight, protects sensitive electronics and makes the bike easier to control. At the same time, the centre of gravity shifts to a more favourable position, which makes it much easier to place the bike on the carrier.
Many modern e-bikes are fitted with a push assist. This can be a useful aid when aligning the bike on the rail or making adjustments – provided it is used sparingly. Uncontrolled motor assistance whilst loading the bike is more likely to cause instability than to make the task easier.
Caution is advised when securing the bike. E-bike frames are bulky, often featuring wide down tubes and integrated batteries. Mounting arms should always be attached to sturdy sections of the main frame, not to battery housings, mudguards or moving parts. High clamping pressure is no substitute for correct positioning.
E-bike Special
- Batteries removed and stowed away safely
- Displays / On-board computers removed
- Controlled use of a sliding aid during positioning
Securing bikes on a bike rack: keep them secure without crushing them
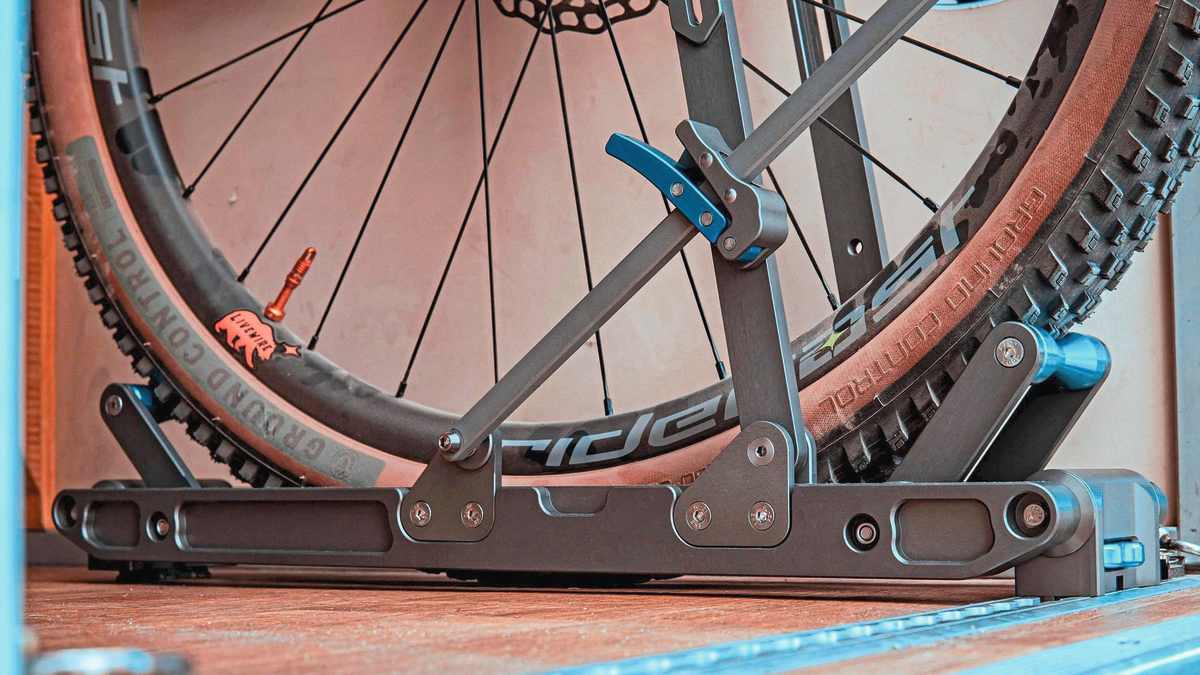
Securing bicycles to a bike rack is a delicate balancing act. The aim is to secure the bike firmly without putting unnecessary strain on the frame or its components. Modern towbar-mounted bike racks use clamping arms on the frame and additional straps on the wheels.
Caution is advised when dealing with delicate frame materials, particularly carbon. A particularly firm grip on the brackets is not a sign of quality, but a potential risk. A form-fit securing system is preferable, where the bike cannot be moved even with moderate pressure. Clamping arms with ratchet straps and additional rubber buffers are particularly well suited to carbon frames.
Securing to the bike rack
- Brackets attached to the sturdy main frame
- No components or battery casings are jammed
- Tyres securely tensioned, not deformed
Handlebars, pedals, saddles: small details with a big impact
Many contact issues are not caused by the frame, but by protruding components. Handlebars that stick out sideways, seat posts that are not recessed, or pedals in an awkward position can quickly lead to the parts rubbing against one another, which, over time, leaves marks and scratches.
A quick check before setting off helps: turn the handlebars in slightly, align the pedals, and lower the saddle. This little bit of extra effort prevents scratches, protects the cables and stops the bikes from rubbing against each other whilst travelling. You should ensure there is sufficient space between the individual rails when purchasing the bike rack. The stanchions of the suspension fork or the dropouts of the frame can be given additional protection using special protectors from the manufacturer’s range of accessories.
Contact details on the bike rack
- Handlebars turned in slightly
- Pedals correctly aligned
- Saddles lowered, no contact points
Anti-theft measures: useful, but no substitute for vigilance
Almost all towbar-mounted bike carriers feature built-in locks for the carrier and the bikes. These are practical and enhance security during short stops. However, they are no substitute for an additional lock if the vehicle is left unattended for a longer period. During the journey, however, any additional locks should be removed, as they may otherwise damage the paintwork or frame.
It is also important to check locks regularly. Dirt, moisture and road salt take their toll on the mechanisms and can cause locks to become stiff or jam – often just when you’re in a hurry.
Technology & Law
- The lighting is working
- Number plates fitted in a clearly visible position
- Parking sensors/driver assistance systems taken into account
Checks before setting off and whilst on the move
Once the load has been secured, it is advisable to carry out a final check. Are all the retaining arms in the correct position? Are the straps tight? Is the lighting working? You should drive carefully, particularly during the first few kilometres, and stop again after a short distance to check that the load is secure.
Materials settle, and seatbelts can become loose. This short break significantly improves safety and is particularly useful on long motorway journeys.
Shortly after setting off
- Stop after approx. 10–20 km
- Restraints and straps tightened
- Träger remains out of action
Conclusion: Good bike racks deserve to be handled properly
A bike rack relies on a combination of well-thought-out design and correct use. If you take a systematic approach to loading, pay attention to the type of equipment and its weight, and develop a few simple routines, you will not only transport your bikes more safely but also with greater peace of mind. It takes very little time – yet the benefits in terms of safety and preserving the value of your bikes are considerable.

Stefan Frey
Editor